
Install OpenClaw on Ubuntu 24.04 Desktop (Physical Machine)
This guide helps you install Ubuntu 24.04 Desktop on a dedicated physical machine (or a long-running spare host) and deploy OpenClaw as a permanent service. Ideal for running an OpenClaw relay node 24/7.
Step 1: Prepare the installation media
Section titled “Step 1: Prepare the installation media”- Download the Ubuntu 24.04 LTS Desktop ISO from ubuntu.com/download/desktop.
- Write the ISO to a USB drive (≥8 GB) using Rufus (Windows) or
dd(Linux/macOS).
# Linux / macOS examplesudo dd if=ubuntu-24.04-desktop-amd64.iso of=/dev/sdX bs=4M status=progressStep 2: Install the system (detailed, with screenshots)
Section titled “Step 2: Install the system (detailed, with screenshots)”2.1 Enter BIOS and boot from USB
Section titled “2.1 Enter BIOS and boot from USB”- Insert the USB drive and restart. Press the BIOS hotkey during boot (varies by vendor):
| Brand | Key | Brand | Key |
|---|---|---|---|
| ASUS | F2 / Del | Dell | F2 / F12 |
| Lenovo | F2 / F12 | HP | Esc / F10 |
| MSI | Del | Gigabyte | Del / F12 |
- In BIOS, confirm these settings (recommended):
- Boot mode: UEFI (disable Legacy/CSM; most modern machines default to UEFI)
- Secure Boot: can stay enabled — Ubuntu 24.04 supports it; disable only if the machine fails to boot
- Boot order: put the USB drive first
- Save and exit (usually F10) to boot from the USB drive.
Alternatively, press the boot-menu key at startup (often F12 / F11 / Esc) and pick the USB drive without entering BIOS.
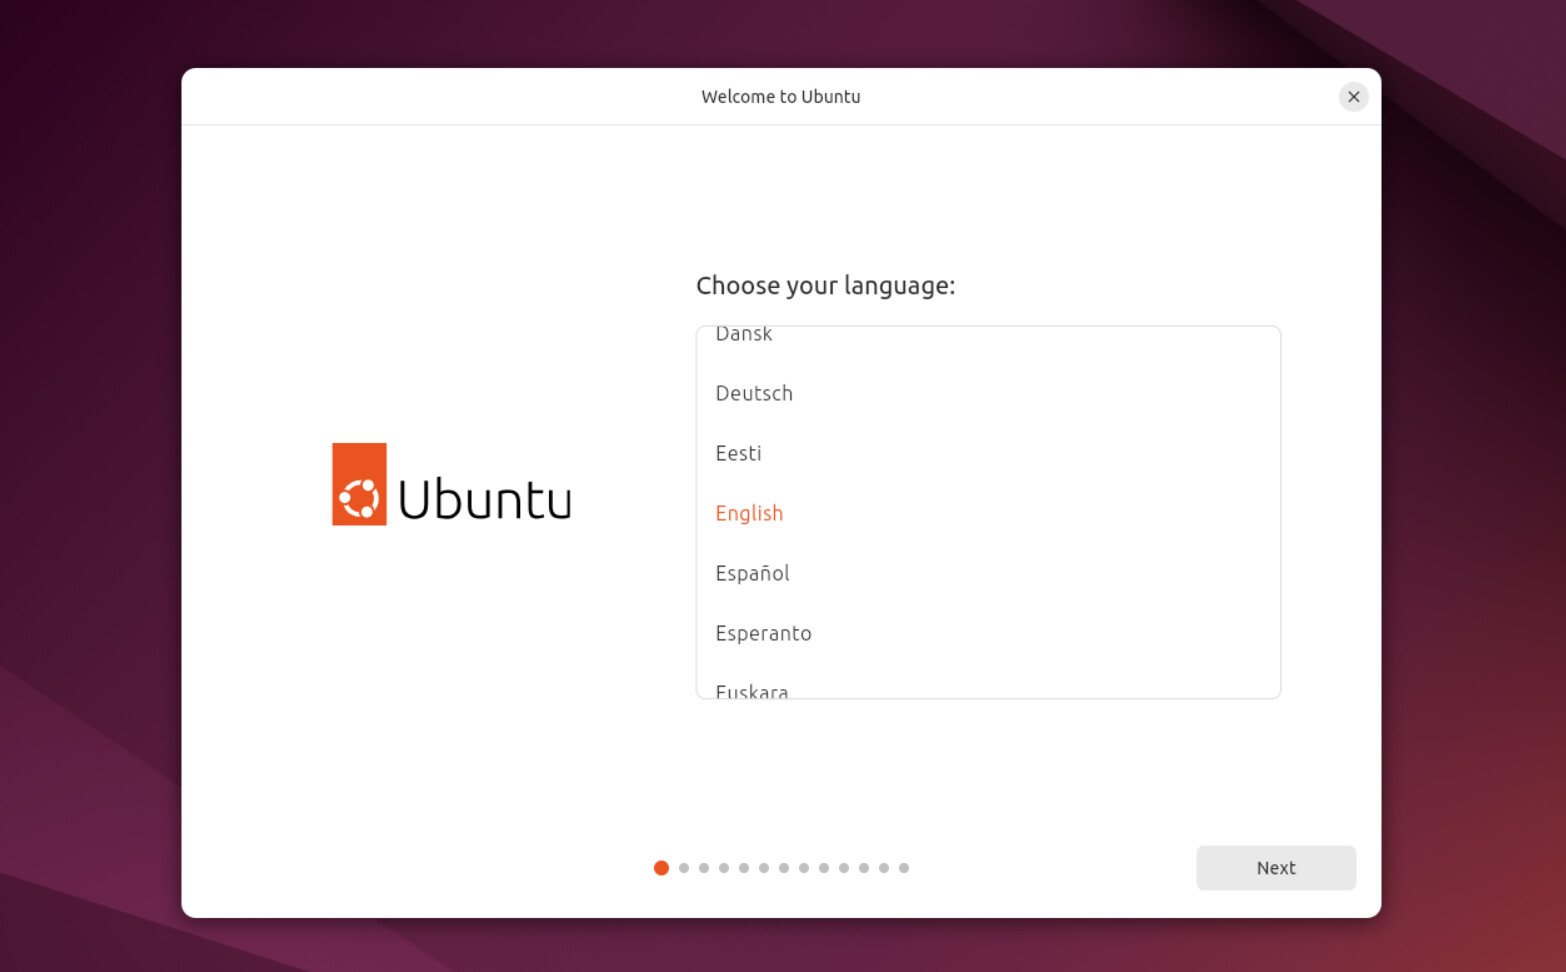
2.2 Choose your language
Section titled “2.2 Choose your language”After booting from USB, pick your language and click Install Ubuntu:
2.3 Install or Try Ubuntu
Section titled “2.3 Install or Try Ubuntu”Choose Install Ubuntu. If you pick “Try Ubuntu” you can preview the system first, then click the “Install Ubuntu” shortcut on the desktop to continue:
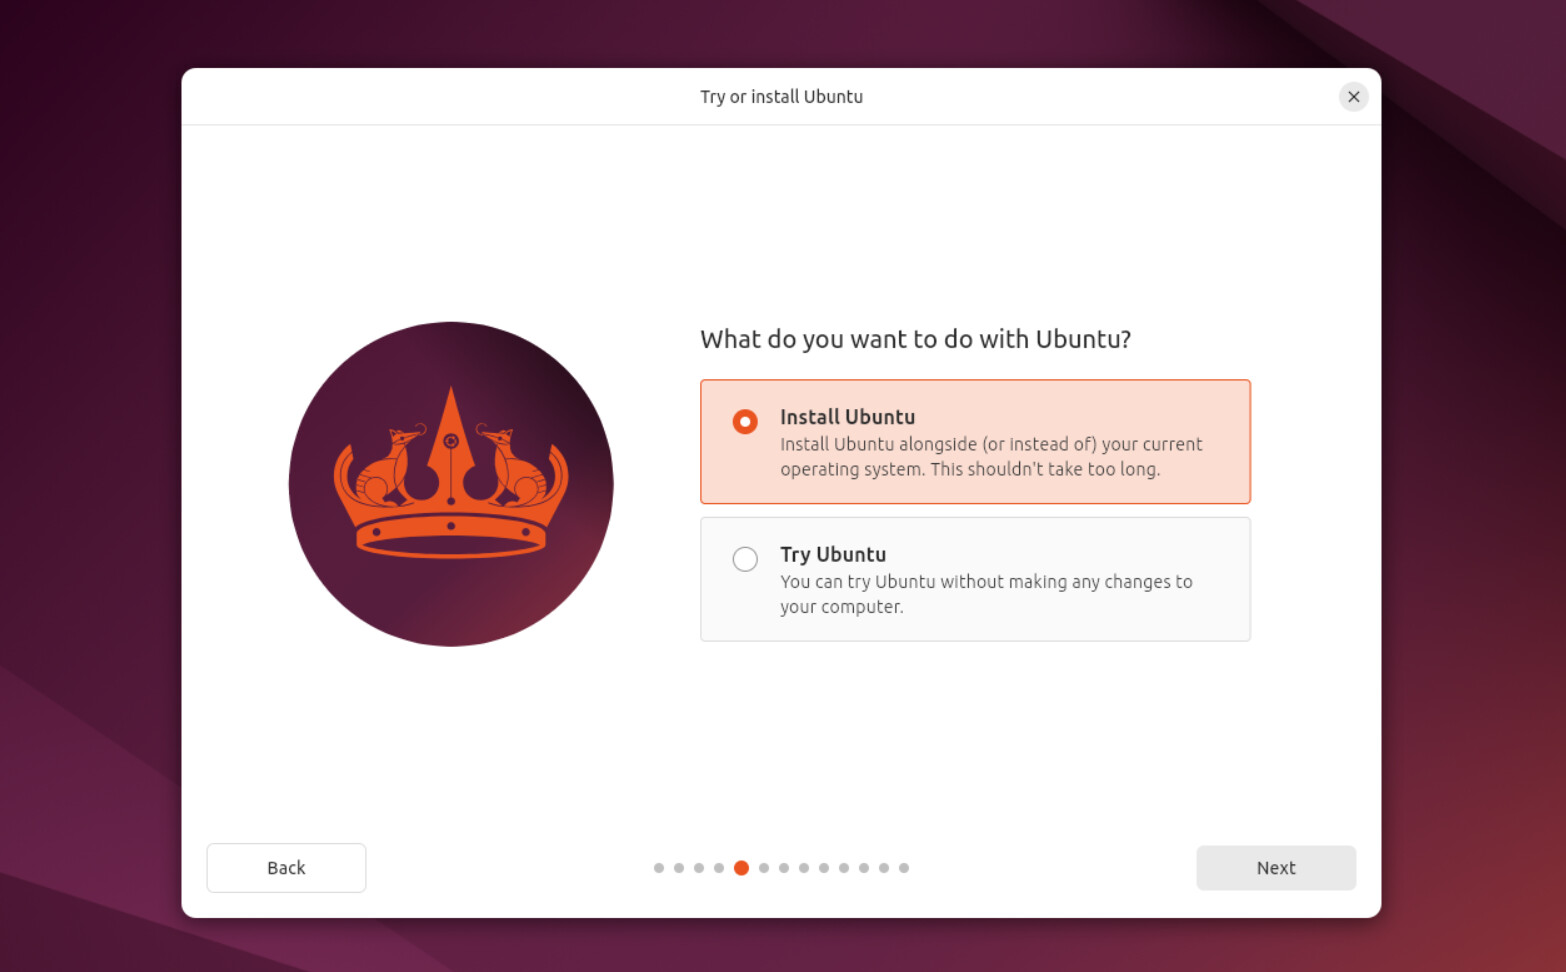
If you see an Intel RST alert (some Lenovo/Dell machines), enter BIOS and switch the SATA mode from RST/RAID to AHCI to continue.
2.4 Keyboard layout
Section titled “2.4 Keyboard layout”Keep the default English (US), or search and add Chinese Pinyin if needed (you can also add it later in Settings).
2.5 Connect to a network (optional)
Section titled “2.5 Connect to a network (optional)”Connect if possible — the installer can then download updates and third-party drivers (e.g. NVIDIA) during installation.
2.6 Choose the installation type (partitioning — the key step)
Section titled “2.6 Choose the installation type (partitioning — the key step)”Ubuntu 24.04 offers two install modes:
- Interactive installation — used in this guide
- Automated installation — for mass deployment via a config file; not needed for beginners
After choosing “Install Ubuntu”, you’ll see two disk handling options:
Option A: Automatic partitioning (recommended for beginners)
Section titled “Option A: Automatic partitioning (recommended for beginners)”Choose Erase disk and install Ubuntu — the installer creates the EFI, root, and swap partitions automatically:
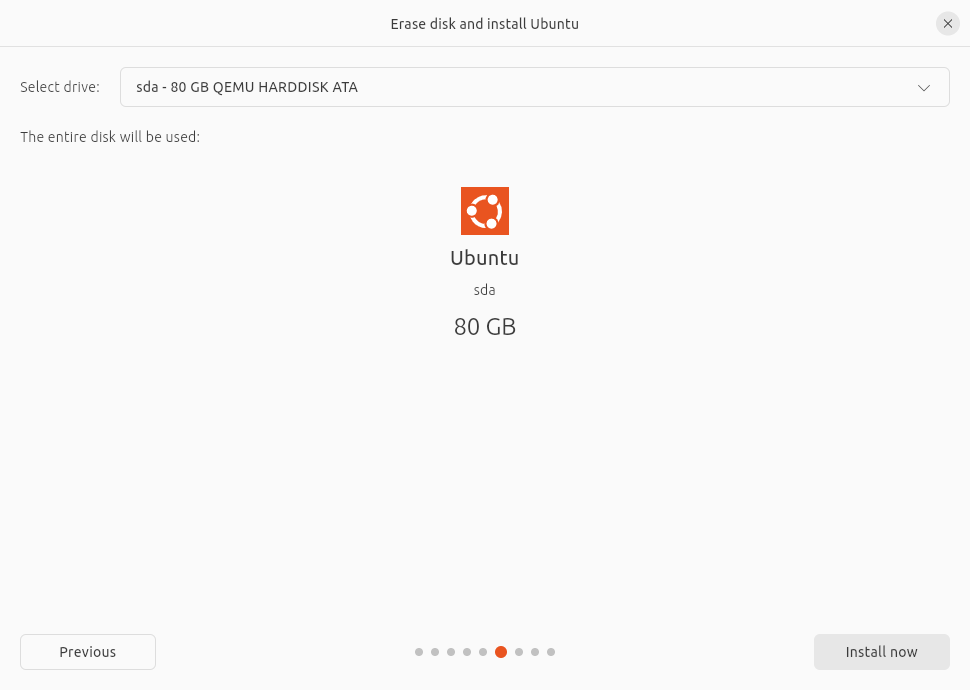
Best for: users who don’t care about disk details and want the fastest install. Note this wipes the entire disk.
Option B: Manual partitioning (recommended for an always-on OpenClaw host)
Section titled “Option B: Manual partitioning (recommended for an always-on OpenClaw host)”Choose Something else (manual partitioning), then click New Partition Table on the target disk (GPT) and create partitions as recommended below:
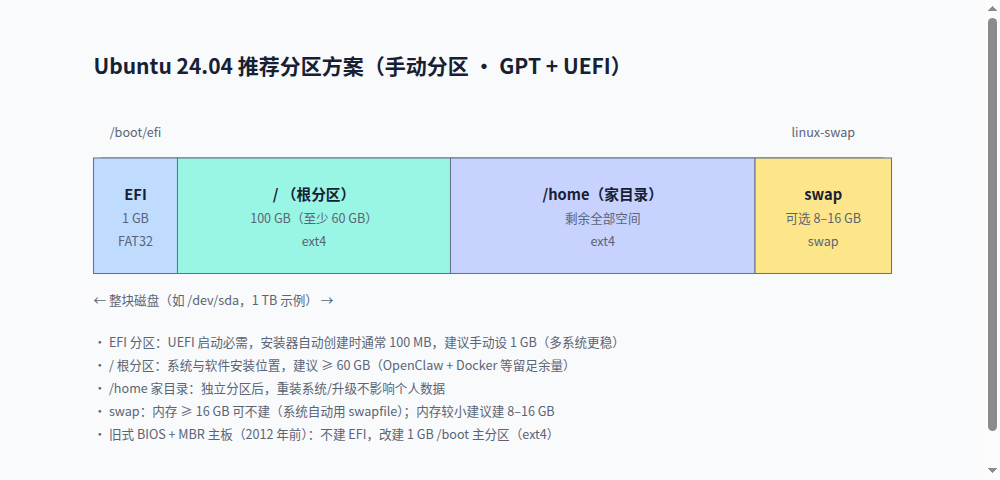
| Partition | Size | Type / filesystem | Mount point | Purpose |
|---|---|---|---|---|
| EFI System | 1 GB | FAT32 (EFI System Partition) | /boot/efi | UEFI bootloader, more stable for multi-boot |
| Root / | 100 GB (≥ 60 GB) | ext4 | / | System and software |
| /home | all remaining space | ext4 | /home | User data kept separate — survives reinstalls |
| swap | optional 8–16 GB | swap | (auto) | Virtual memory when RAM is low |
Manual partitioning steps (1 TB disk example):
- Select the target disk → New Partition Table → confirm (wipes all partitions on it).
- Click + to create the EFI System Partition: size
1024 MB, type “EFI System Partition”, mount point/boot/efi, OK. - Click + for the root partition: size
100 GB, filesystemext4, mount point/, OK. - Click + for /home: size = remaining space minus swap (e.g. ~
900 GBon a 1 TB disk), filesystemext4, mount point/home, OK. - (Optional) Click + for swap: size
8192or16384MB, type “swap area”, OK. - Keep “Device for boot loader installation” at its default (the whole disk, e.g.
/dev/sda) and click Install Now.
💡 Partitioning principles: with ≥ 16 GB RAM you can skip a swap partition (Ubuntu auto-enables a swapfile); with less RAM, create 8–16 GB. For a Windows dual boot, install Windows first, then Ubuntu — GRUB detects both automatically.
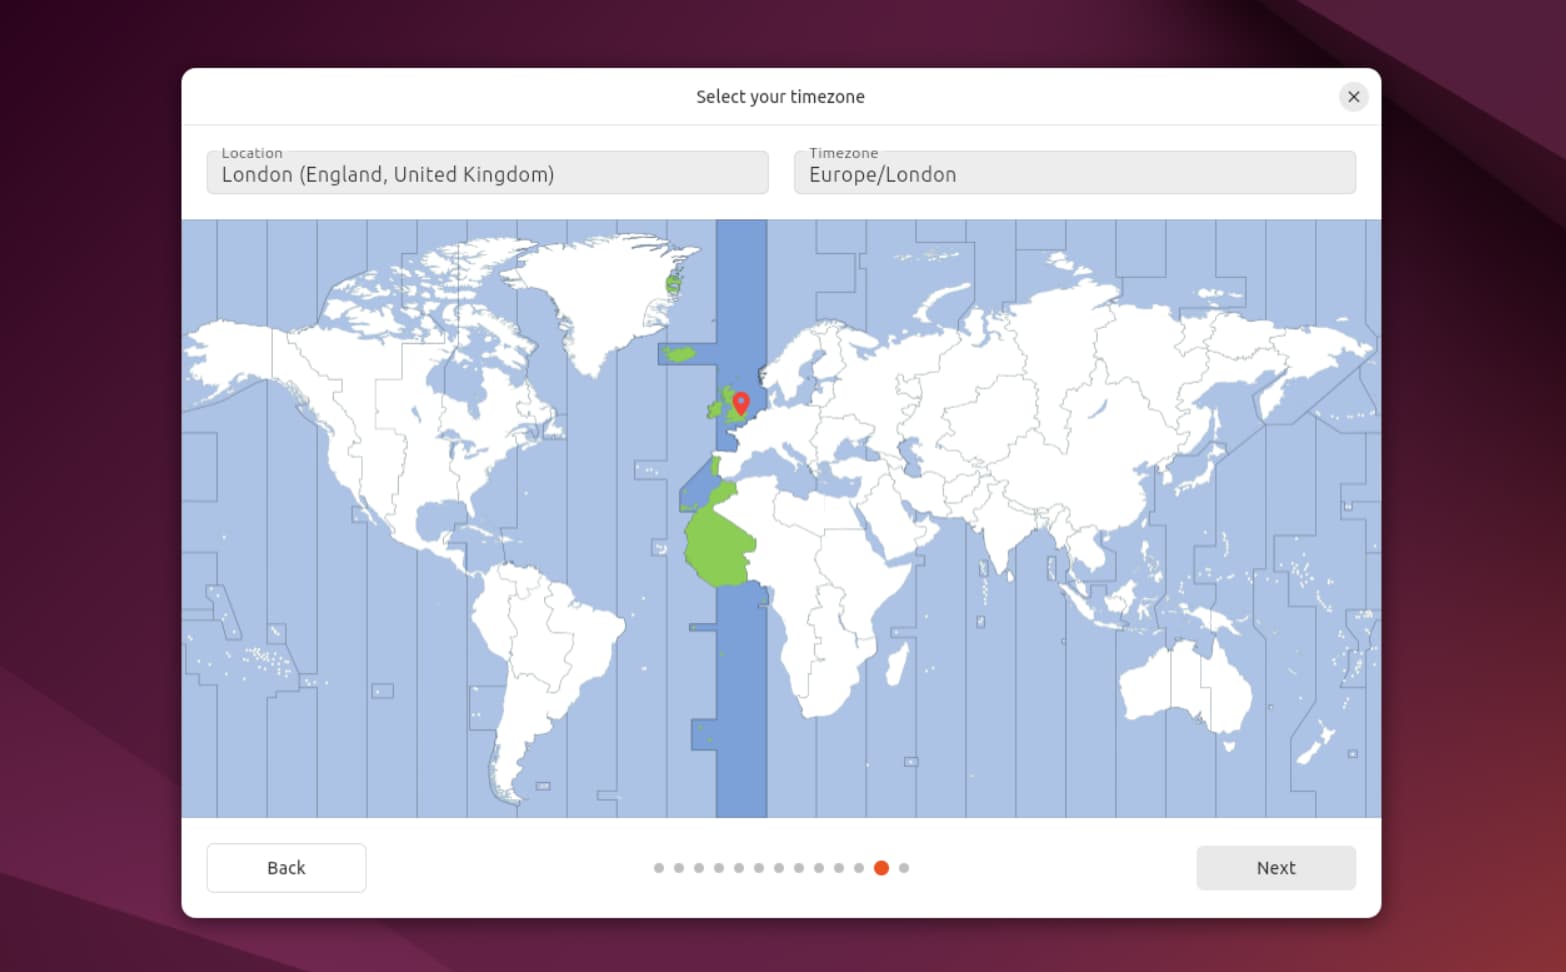
2.7 Confirm changes and pick your timezone
Section titled “2.7 Confirm changes and pick your timezone”- Review the changes the installer will make and click Continue.
- Pick your timezone (e.g. Shanghai — click on the map or type it):
2.8 Create your user account
Section titled “2.8 Create your user account”Fill in:
- Your name: display name (e.g.
rockchen) - Your computer’s name: auto-generated, editable (e.g.
openclaw-host) - Pick a username: login name used with
sudolater (e.g.rockchen) - Password: set it and remember it (you can require it at login)
2.9 Wait for the installation to finish
Section titled “2.9 Wait for the installation to finish”Files are copied now — about 5–15 minutes depending on disk speed. Click Restart Now when done, remove the USB drive during reboot, then press Enter at the GRUB menu to boot into Ubuntu.
Step 3: Update the system
Section titled “Step 3: Update the system”Open a terminal (Ctrl+Alt+T):
sudo apt update && sudo apt upgrade -yStep 4: Install OpenClaw
Section titled “Step 4: Install OpenClaw”curl -fsSL https://openclaw.ai/install.sh | bashVerify:
openclaw --versionStep 5: Initialize and enable auto-start
Section titled “Step 5: Initialize and enable auto-start”openclaw onboard --install-daemonPick your model provider and paste your API key. --install-daemon registers the Gateway as a systemd user service that runs when you log in.
To keep it running even when nobody is logged in (recommended for server use), enable user lingering:
Terminal window
Step 6: Access from your LAN (optional)
Section titled “Step 6: Access from your LAN (optional)”Find your LAN IP:
ip addr showFrom any device on the same network, open:
http://<host-IP>:18789Step 7: Secure remote access (Tailscale recommended)
Section titled “Step 7: Secure remote access (Tailscale recommended)”For access from outside your network, install Tailscale (WireGuard-based):
curl -fsSL https://tailscale.com/install.sh | shsudo tailscale upAfter signing in, your host gets a fixed 100.x.y.z address reachable from any device on the same account:
http://<Tailscale-IP>:18789⚠️ Security: never expose port 18789 directly to the public internet. Always use Tailscale / VPN tunnels for external access.
Troubleshooting
Section titled “Troubleshooting”OpenClaw doesn’t auto-start after reboot?
Section titled “OpenClaw doesn’t auto-start after reboot?”openclaw statussystemctl --user status openclaw-gatewayMake sure loginctl enable-linger was run.
Want a static IP?
Section titled “Want a static IP?”Configure it under Settings → Network (manual IP, netmask, gateway) to avoid DHCP address drift.
Next steps
Section titled “Next steps”- Configure your model: OpenClaw Installation & Model Configuration
- Connect DLinkClaw: DLinkClaw Channel Plugin